And there's the video how I have created the lamp:
Posts mit dem Label Workshop werden angezeigt. Alle Posts anzeigen
Donnerstag, 4. April 2013
All that Stickles - Ikea Lamp
Today I'm featured on the All that Stickles Blog with my ikea lamp. Please hop over to their blog to see more infos about it.
And there's the video how I have created the lamp:
Mittwoch, 20. März 2013
Visible Image Wednesday: Immortal Love
Today I have a little tutorial of my acetate tag for you - hope you like it.
First of all I cut out an acetate tag and embossed it with an embossingfolder two times - only one part of the tag every time.
Now I stamped the text - I have used "immortal" "love" of the beautiful Immortal Love Set of Visible Image. Now I took out some color pencils and colored the embossed parts. Of course it's not giving much color but I think the subtle look is beautiful. I used red for the bricks.
And here I used black to draw the lines between the bricks.
Now I stamped the roses of the Immortal Love Set on a separate piece of acetate, cut them out and colored them with Alcohol Inks. I glued them down with Glossy Accents.
And here's the finished tag. As you can see I have punched a hole for a ribbon and the film strip was also stamped on a separate piece of acetate, cut out and glued down with Glossy Accents.
Please also take a look at the wonderful stamps in the Visible Image Onlineshop. And hop over to the Visible Image Blog and/or join us in the Visible Image Facebook Group!
First of all I cut out an acetate tag and embossed it with an embossingfolder two times - only one part of the tag every time.
Now I stamped the text - I have used "immortal" "love" of the beautiful Immortal Love Set of Visible Image. Now I took out some color pencils and colored the embossed parts. Of course it's not giving much color but I think the subtle look is beautiful. I used red for the bricks.
And here I used black to draw the lines between the bricks.
Now I stamped the roses of the Immortal Love Set on a separate piece of acetate, cut them out and colored them with Alcohol Inks. I glued them down with Glossy Accents.
And here's the finished tag. As you can see I have punched a hole for a ribbon and the film strip was also stamped on a separate piece of acetate, cut out and glued down with Glossy Accents.
Please also take a look at the wonderful stamps in the Visible Image Onlineshop. And hop over to the Visible Image Blog and/or join us in the Visible Image Facebook Group!
Mittwoch, 13. März 2013
ATC with perfect pearls - Video
Perhaps you'll remember my ATC I have posted a week ago. It has been admired by many people and I have promised to create a video to show how it is done. So here's my new ATC:
And here's the video:
I'd like to enter my ATC to the following challenges:
http://www.thehousethatstampsbuilt.com/ - brayering
http://nutcrafters.blogspot.co.uk/ - something beginning with b (brayering)
http://paperprettiesblog.blogspot.co.at/ - create your own background
http://7kidschallengeblog.blogspot.co.at/ - glitter
http://www.craftdoormagazine.com/ - anything goes
http://tuesdayalchemy.blogspot.co.at/ - anything goes
And here's the video:
I'd like to enter my ATC to the following challenges:
http://www.thehousethatstampsbuilt.com/ - brayering
http://nutcrafters.blogspot.co.uk/ - something beginning with b (brayering)
http://paperprettiesblog.blogspot.co.at/ - create your own background
http://7kidschallengeblog.blogspot.co.at/ - glitter
http://www.craftdoormagazine.com/ - anything goes
http://tuesdayalchemy.blogspot.co.at/ - anything goes
Donnerstag, 25. Oktober 2012
Upcoming Workshops
I will teach workshops at a local scrapbooking store in Vienna - here is a list of them:
Ab November darf ich ein paar Kurse bei Pipilonia halten - hier ein Überblick über meine Workshops:
Diese Übersicht findet ihr natürlich auch unter Workshops in meiner Blogleiste.
Ab November darf ich ein paar Kurse bei Pipilonia halten - hier ein Überblick über meine Workshops:
Stempeln mit Distress - 6. 11. 2012, 17-20 Uhr bei Pipilonia
& 8.4.2013, 10-13 Uhr bei Pipilonia
hier buchen
December Daily - 20.11.2012, 16:30 - 20 Uhr bei Pipionia
Kurs buchen: hier
Altered Book - 4.12.2012 und 20.2.2013 jeweils 16:30-20 Uhr bei Pipilonia
hier buchen
Diese Übersicht findet ihr natürlich auch unter Workshops in meiner Blogleiste.
Dienstag, 2. Oktober 2012
Tando Creative Birthday Week - Project of Threes
As I told you yesterday Tando Creative celebrates it's third birthday and there's a big party! Have you taken part in the great retailer blog hop yet? If not then hop over, there are great prizes to win!!
From today on we will post everyday great tutorials to our projects - the whole week!!
Here's mine:
I have taken 3 wavy tags and created a triptych. I have filmed the creating process - I hope you like my video!!
Here's the video:
From today on we will post everyday great tutorials to our projects - the whole week!!
Here's mine:
I have taken 3 wavy tags and created a triptych. I have filmed the creating process - I hope you like my video!!
Here's the video:
Dienstag, 25. September 2012
Home is where you are - Minibook incl. video
It's my turn over at Tando Creative. For our minibook-week I have prepared a "Home"-minibook and filmed the process of creating it.
Please visit the Tando Creative blog where I have written more infos about which chipboards I have used.
Labels:
Minibücher,
Scrapbooking,
tando creative,
Video,
Workshop
Sonntag, 9. September 2012
Art Journal Page like in the video
Here I have an art journal page like in my video (http://cbee-cards-and-more.blogspot.co.at/2012/09/art-journal-page-video.html) ... that's the page I filmed and where I had to discover that not everything was saved, so I had to make a new video.
Donnerstag, 6. September 2012
Art Journal Page - Video
A new video ... still not perfect but with a better webcam recorded and edited with a better software.
I was asked to share a video how I have made this page: Art Journal - Image Transfer. So here it is. I had some troubles with it though. Yesterday I created a page and recorded it but then I discovered that it wasn't saved completely, so I had to make a new video with a new page - this time I decided to do it in a different color - blue. Here the image of the magazine was not so perfect - the paper didn't get off easily and did pull off completely at some spots - but I don't mind, it adds to the distressed look.
I hope you like my page and my video!
I was asked to share a video how I have made this page: Art Journal - Image Transfer. So here it is. I had some troubles with it though. Yesterday I created a page and recorded it but then I discovered that it wasn't saved completely, so I had to make a new video with a new page - this time I decided to do it in a different color - blue. Here the image of the magazine was not so perfect - the paper didn't get off easily and did pull off completely at some spots - but I don't mind, it adds to the distressed look.
I hope you like my page and my video!
Montag, 27. August 2012
Tag for Studio L3 & my first video
Today I have filmed my first video - of course there's much to make better so please be kind ;)
The tag I have created is for the challenge at Studio L3. The beautiful chipboard flourish, flowers & butterfly are from tando creative. ... don't forget that there's a blog hop at tando creative!!
Freitag, 17. August 2012
Sneak - Altered Book
Die letzten Tage habe ich an einem Altered Book für einen Kurs im Herbst gearbeitet. Details folgen im September/Oktober, aber einen kleinen Sneak habe ich für euch.
The last days I have worked on an altered book for a class in autumn. I will post the details in September/October, but here you can see a little sneak.
Sonntag, 13. Mai 2012
Swimming & kleiner Workshop
Dieses Layout ist nach dem Sketch der Woche im SBT entstanden. Es hat mich schon lang gedrängt, wieder mal ein Mosaik zu machen - allerdings wollte ich kein "einfaches" Mosaik machen, sondern ein "bißchen mehr" und ich denke, das ist mir ganz gut gelungen. Nach den Bildern des Layouts findet ihr auch einen kleinen Workshop zu meiner Blume, die ich aus Spitze und einer Prima Flower gemacht habe. ... die Inspiration bekam ich dafür von Tim Holtz ;)
This layout is based on a sketch of the week of a German forum. For a long time I wanted to do a mosaik again but I didn't want to make a "simple one", it had to be a "little more" - I think I have reached my goal. After the pictures of my layout you will find a little workshop for my flower of lace and a Prima flower - I was inspired by Tim Holtz ;)
Workshop little lace flower
Ihr braucht geeignete Spitze & Nadel & Faden in der passenden Farbe
you will need lace, needle & thread in the same color
Am Ende des Fadens einen Knoten machen und unten an der Spitze den Faden einziehen.
make a knot on the end of the thread and then stitch the lace together
Wenn ihr genug Spitze für eine Blume mit dem Faden zusammengezogen habt, dann näht die Enden zusammen.
If you have enough lace for a flower stitch the ends together.
Die fertige Spitzenblume
the finished lace flower
Nun die Blume ein bißchen färben, ich habe dafür Distress Ink genommen.
Now color the flower a little bit - I have taken distress ink.
Nun habe ich kleine Prima Flowers genommen und auch diese ein bißchen mit Distress Ink gefärbt.
Now take some small Prima flowers and color them too.
UTEE in den Melting Pot geben und schmelzen lassen.
give UTEE in the melting pot and let melt.
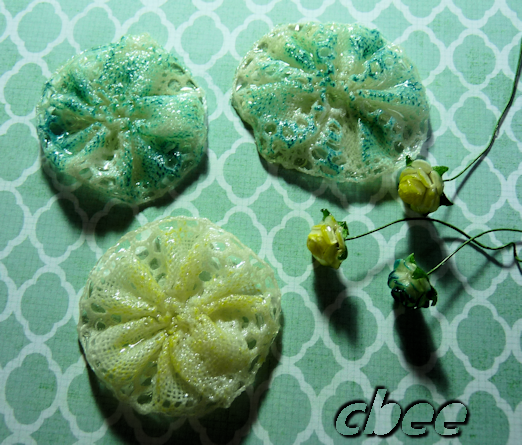
Nun taucht die Blume mit der Vorderseite nach unten in den Meltingpot, wenn sie ganz bedeckt ist, nehmt sie heraus, lasst das UTEE abtropfen und legt sie auf euer Craft Sheet zum Trocknen.
Now dip your flower with the frontside into the UTEE. When it is fully covered take it out and let the UTEE drip off - put it on your craft sheet for drying.
Nun die Prima Flower ins UTEE tauchen und trocknen lassen.
Now dip the Prima flower into the UTEE and let dry.
Die Spitzenblume ein bißchen anwärmen, damit das UTEE leicht anschmilzt, danach sofort die Prima Flower draufdrücken.
Let the UTEE on your lace flower melt a bit, then put your Prima flower on it
So sieht die fertige Blume aus.
Here's the finished flower.
Montag, 16. April 2012
Restekiste-Tags & making of
Heute hab ich ein bißchen gepanscht ... zuerst einige Papierreste verarbeitet, mit Distress Stains gespielt und dann gestempelt ... ein kleines Making Of findet ihr im Anschluss an die Tags.
I have used some paper leftovers, played with Distress Stains and stamped ... further down there's a little making of ...
Making Of
![]() |
| Papierreste ein großes Papier leftovers & paper |
![]() |
| Papierreste bunt durcheinander aufkleben glue leftovers on paper |
![]() |
| mit Gesso überpinseln paint with gesso |
![]() |
| mit Distress Stains einfärben use Distress Stains |
![]() |
| nach Belieben weiterbearbeiten create as you like |
Abonnieren
Posts (Atom)